|
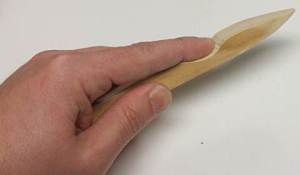
Those hard to reach spots on a project are nearly impossible to sand with a power sander, and sometimes are even difficult to manage with a rotary tool. My solution is a shop-made hand-powered detail sander.
I took some scrap that seemed to fit nicely in my hand roughly 5/8″ x 3/4″ pine and cut it to about 7″ long. Then I placed one end roughly in the center of the palm of my hand and positioned my forefinger on the 3/4″ face. I marked the position of the end and first joint of my forefinger, and marked a dip on the 5/8″ edge that I felt corresponded with the curve of my finger. Next, I marked a rough spearhead shape on the end nearest the finger mark (3/4″ face), then on the 5/8″ edge marked a slight angle.
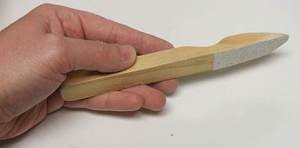
Then it was over to the band saw to shape the piece. After some hand sanding, it was ready for some self-adhesive sandpaper. I cut a piece slightly wider than the spearhead and a couple of inches long, put it in place, and trimmed off the excess.
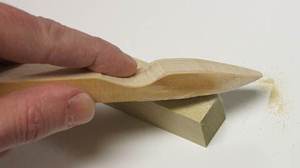
This will be great for detail work, and I now feel confident that I could make one any size or shape I needed for any specific job. When the sandpaper is worn out, Ill just peel it off and cut more to fit.
|