This project is Part Three of a three-part project for a miter saw stand. The first installment was the base and the second was the extensions.
Follow ALL SAFETY GUIDELINES AND RECOMMENDATIONS provided by the manufacturers of your tools, and any chemicals such as glue and finishes you use in this project. YOU are responsible for your safety, so use common sense when working in the shop!
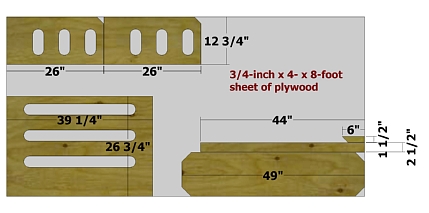
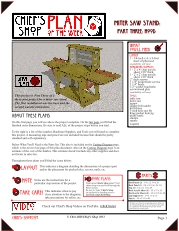
Cutting Diagram
Instructions
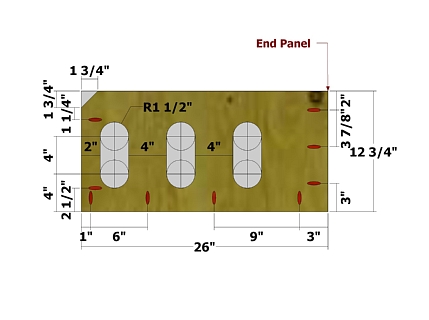
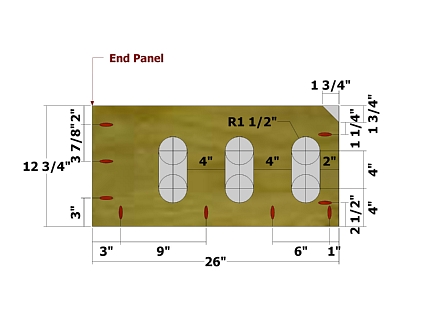
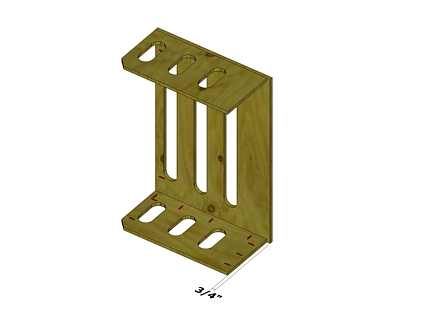
Use the layouts for creating the End Panels. Use a 3-inch hole saw bit to create the starter holes for the openings. Set your Kreg Jig and drill bit for 3/4" stock.
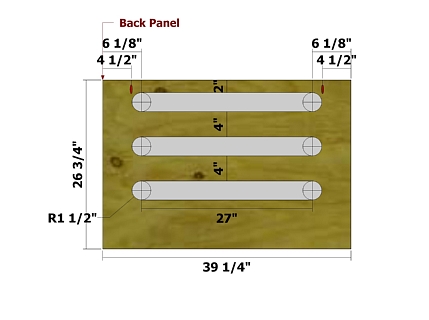
Use the layout for creating the Back Panel. Use a 3-inch hole saw bit to create the starter holes for the openings. Set your Kreg Jig and drill bit for 3/4" stock. NOTE: Measure the distance between your Extensions first, then cut the Back Panel to fit within the Extensions.
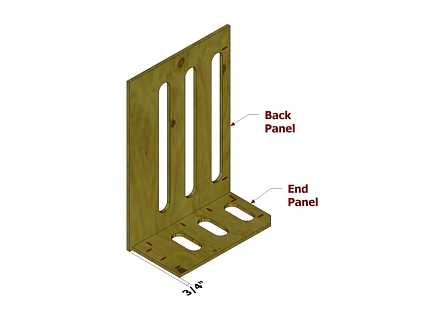
Position the parts as shown and attach using glue and 1 1/4" pocket hole screws.
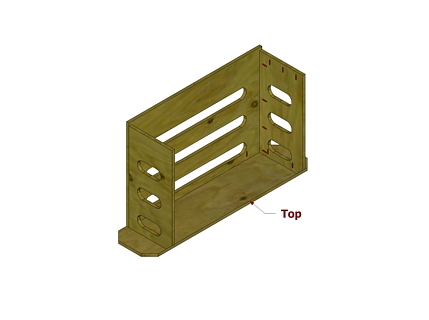
Use the layout for creating the Top.
Position the parts as shown and attach using glue and 1 1/4" pocket hole screws.
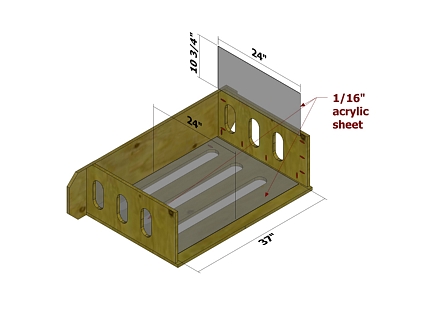
The acrylic sheet allows the hood to be enclosed, but still allow light to enter. Use a utility knife to cut the acrylic sheet to size (use a T-square to guide the cuts). Drill pilot holes for 1/2" washer head lath screws and attach the acrylic sheet using the screws. Do not over tighten the screws as this could crack the acrylic.
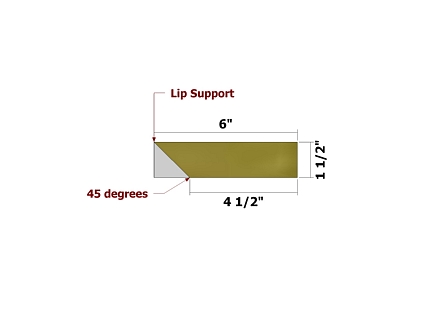
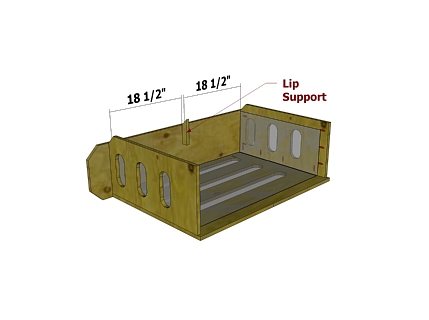
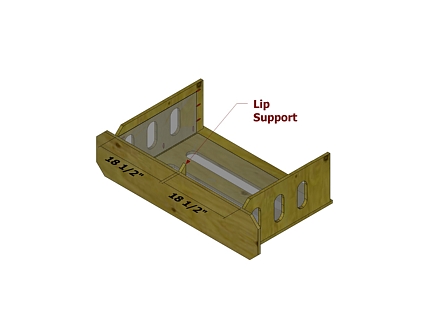
Use the layout for creating the Lip Support.
Position the Lip Support as shown and attach using glue and 2" deck screws driven through the Top.
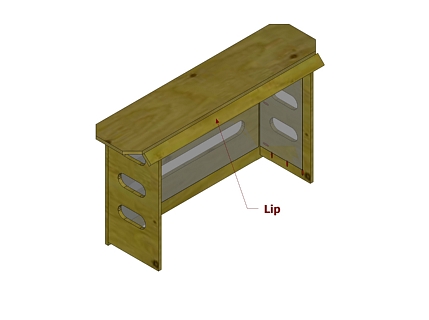
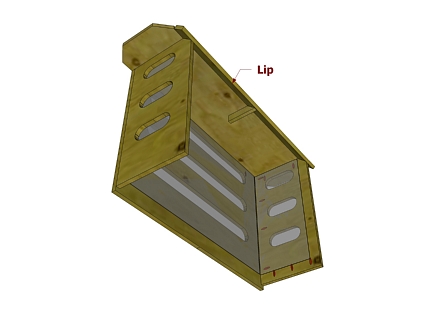
Position the Lip as shown, and attach to the End Panels and Lip Support using glue and 1 1/4" brads.
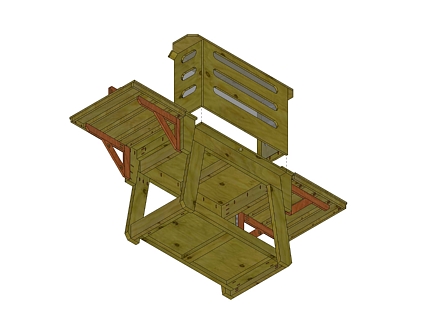
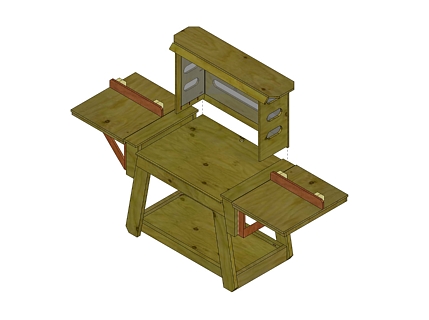
Position the Hood Assembly with the 3/4" overhang on the Back Panel flush against the back edge of the Miter Saw Stand Base.
Attach the End Panels to the Miter Saw Stand Base using 1 1/4" pocket hole screws.
What Youll Need
Lumber1 - 3/4-inch x 4- x 8-foot sheet of plywood (availability will vary) Hardware & Supplies1 - 2' x 4' clear acrylic sheet 1/16" thick 1 - 2' x 2' clear acrylic sheet 1/16" thick 2" deck screws 1 1/4" pocket hole screws 1 1/4" brads 1/2" washer head lathe screwswood glue (availability will vary) Toolstable saw miter saw jigsaw sander/belt sander drill/driver 3-inch hole saw bit Kreg pocket hole jig utility knife clamps square T-square
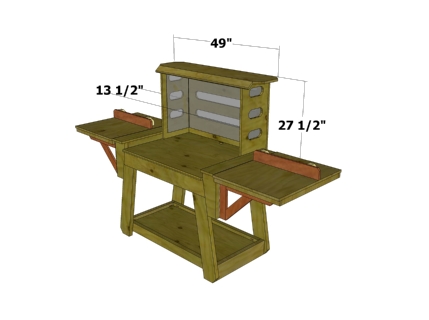
Parts
End Panels (2) - 3/4 x 12 3/4 x 26 Back Panel (1) - 3/4 x 39 1/4 x 26 3/4 Top (1) - 3/4 x 11 3/4 x 49 Back Acrylic Sheet (1) - 1/8 x 37 x 24 End Acrylic Sheets (2) - 1/8 x 10 3/4 x 24 Lip Support (1) - 3/4 x 1 1/2 x 6 Lip (1) - 3/4 x 2 1/2 x 44 All parts are listed in actual dimensions. Refer to the Cutting Diagram below left (a larger version is in the pdf download below) as a guide for determining the specific board from which to cut the parts.