Your garden is your domain, so why not create a perch from which you can oversee it? With proper maintenance, this extremely sturdy garden throne will last many years.
Follow ALL SAFETY GUIDELINES AND RECOMMENDATIONS provided by the manufacturers of your tools, and any chemicals such as glue and finishes you use in this project. YOU are responsible for your safety, so use common sense when working in the shop!
Cutting Diagram
Instructions
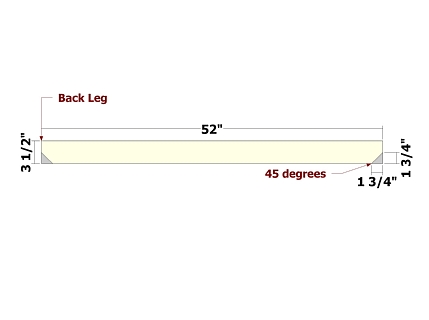
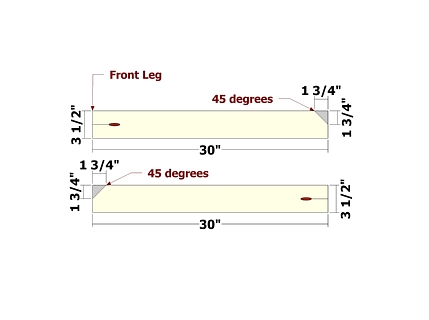
Use the layouts for creating the Front Legs and Back Legs. Set your Kreg Jig and drill bit for 1 1/2" stock for the pocket holes on the Front Legs (you'll be driving 2 1/2" pocket hole screws into 1 1/2" stock later).
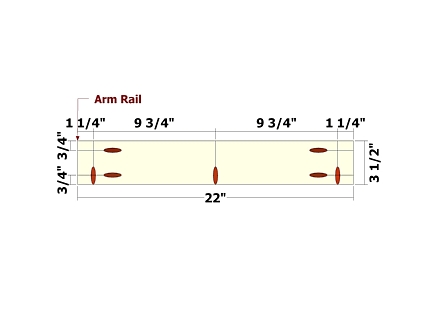
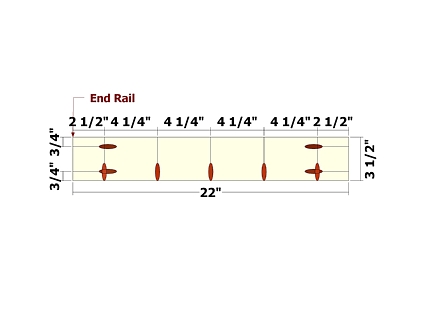
Use the layouts for creating the Arm Rails and End Rails. Set your Kreg Jig and drill bit for 1 1/2" stock for all pocket holes on both parts. Create two of each.
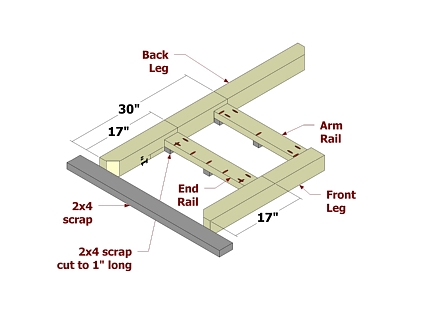
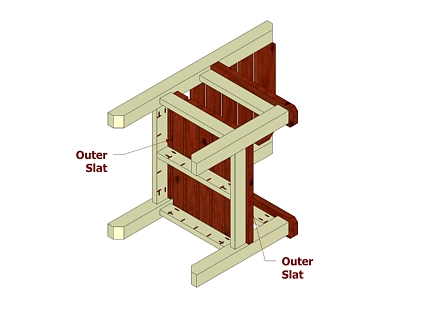
Position the parts as shown and attach using glue and 2 1/2" pocket hole screws. Create two assemblies as shown.
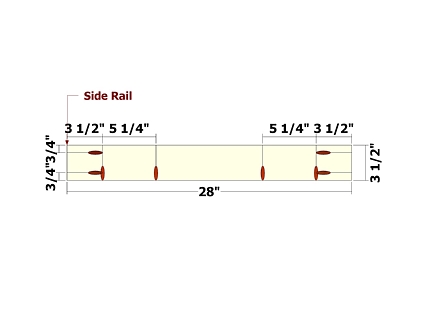
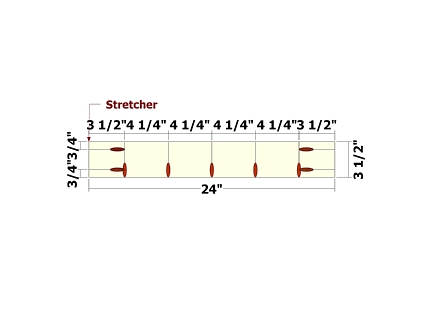
Use the layouts for creating the Side Rails and Stretcher. Set your Kreg Jig and drill bit for 1 1/2" stock for all pocket holes.
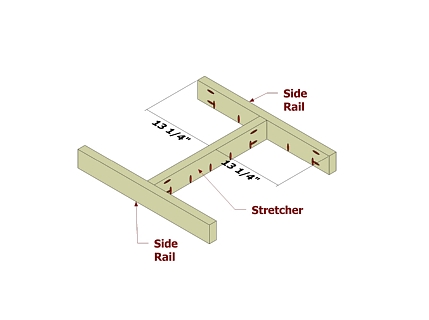
Position the parts as shown and attach using glue and 2 1/2" pocket hole screws.
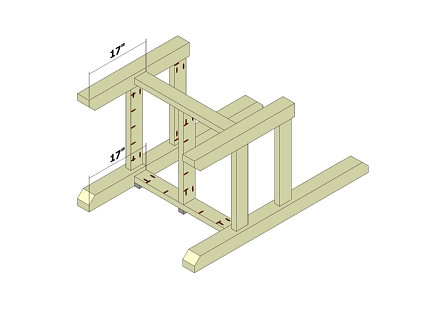
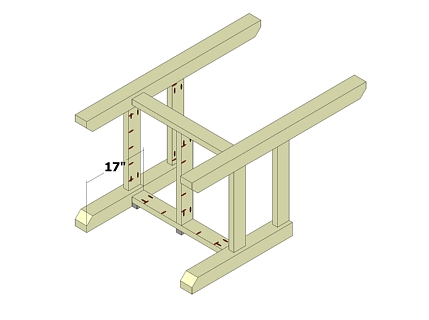
Position the parts as shown and attach using glue and 2 1/2" pocket hole screws.
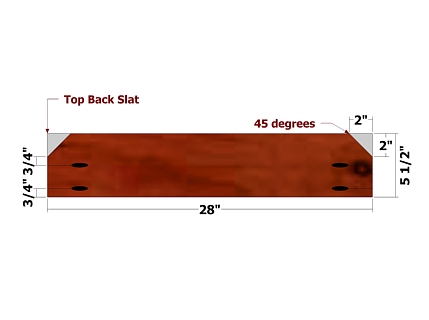
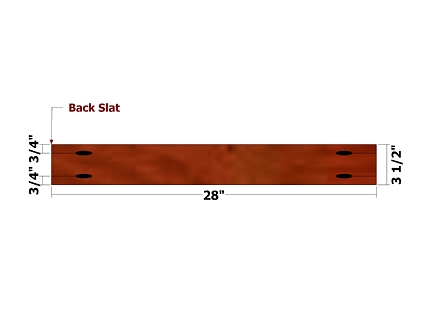
Use the layouts for creating the Top Back Slat and Back slats. Set your Kreg Jig and drill bit for 1 1/2" stock for all pocket holes.
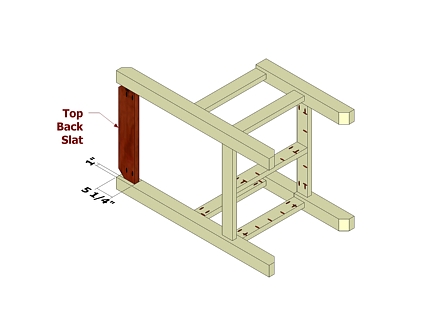
Position the Top Back Slat as shown and attach using glue and 2 1/2" pocket hole screws.
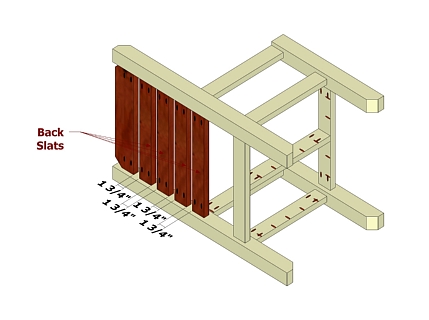
Position the parts as shown and attach using glue and 2 1/2" pocket hole screws.
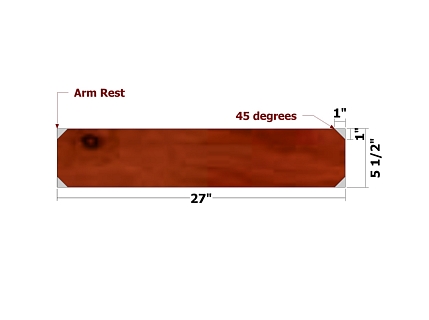
Use the layout for creating the Arm Rest.
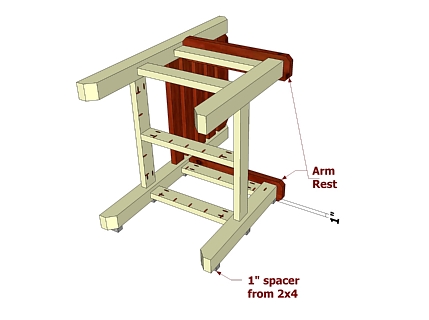
Position the parts as shown and attach using glue and 2 1/2" pocket hole screws.
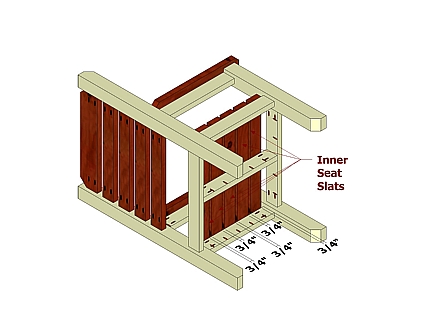
Position the parts as shown and attach using glue and 2 1/2" pocket hole screws.
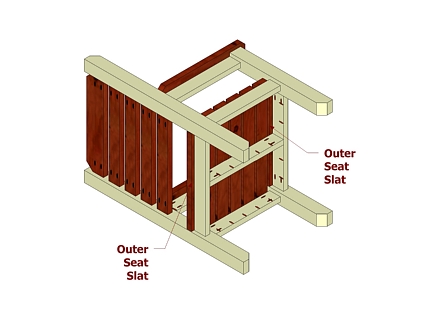
Position the parts as shown and attach using glue and 2 1/2" pocket hole screws.
What Youll Need
Lumber6 - 2 x 4 x 8 1 - 2 x 6 x 8 2 - 4 x 4 x 8(availability will vary) Hardware & Supplies2 1/2" pocket hole screws wood glue paint/stain/ sealer/polyurethane Toolsmiter saw sander/belt sander drill/driver Kreg pocket hole jig clamps square
Parts
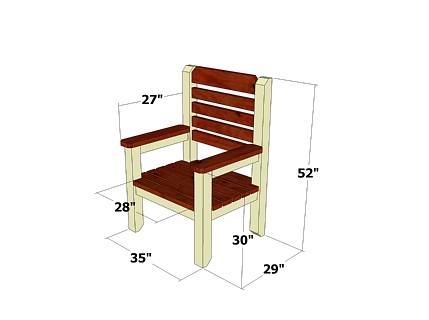
Back Legs (2) - 3 1/2 x 3 1/2 x 52 Front Legs (2) - 3 1/2 x 3 1/2 x 30 Arm Rails (2) - 1 1/2 x 3 1/2 x 22 End Rails (2) - 1 1/2 x 3 1/2 x 22 Side Rails (2) - 1 1/2 x 3 1/2 x 28 Stretcher (1) - 1 1/2 x 3 1/2 x 24 Top Back Slat (1) - 1 1/2 x 5 1/2 x 28 Back Slats (4) - 1 1/2 x 3 1/2 x 28 Arm Rests (2) - 1 1/2 x 5 1/2 x 27 Inner Seat Slats (5) - 1 1/2 x 3 1/2 x 35 Outer Seat Slats (2) - 1 1/2 x 3 1/2 x 27 3/4 All parts are listed in actual dimensions. Refer to the Cutting Diagram below left (a larger version is in the pdf download below) as a guide for determining the specific board from which to cut the parts.