Follow ALL SAFETY GUIDELINES AND RECOMMENDATIONS provided by the manufacturers of your tools, and any chemicals such as glue and finishes you use in this project. YOU are responsible for your safety, so use common sense when working in the shop!
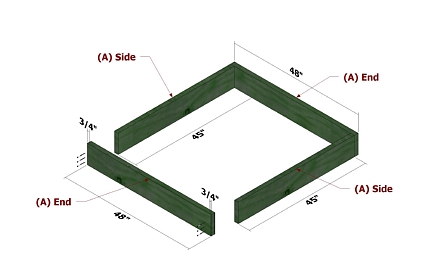
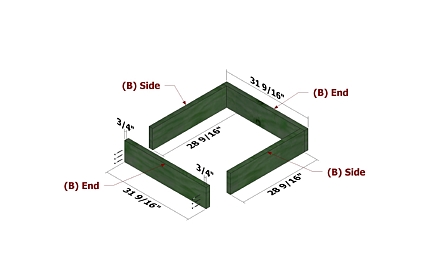
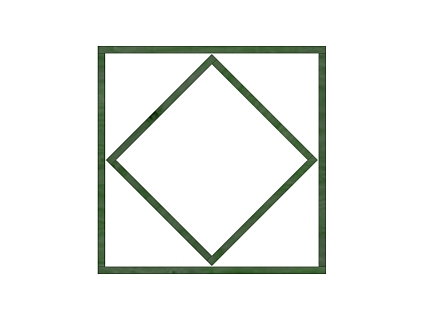
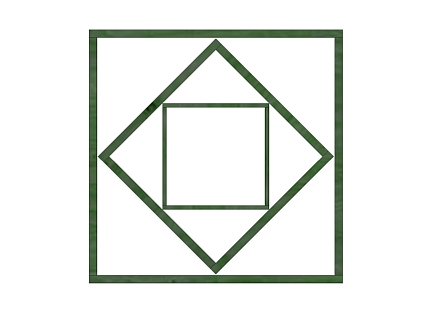
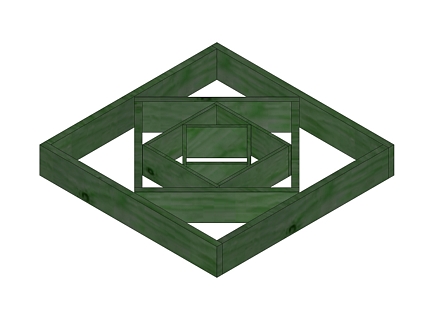
InstructionsFor the next two figures, assemble the parts as shown and attach using 3" deck screws. Apply your preferred finish.
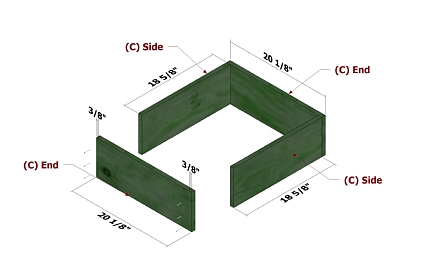
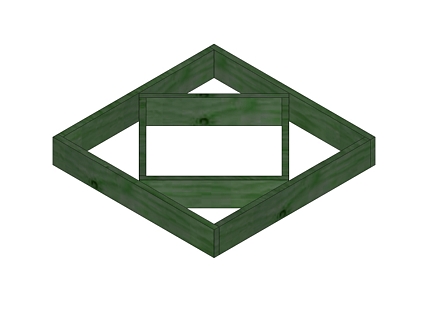
For the next two figures, assemble the parts as shown and attach using glue and 4d galvanized nails. Apply your preferred finish.
What Youll Need
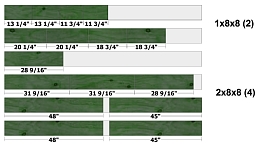
Lumber2 - 1 x 8 x 84 - 2 x 8 x 8(availability will vary) Hardware & Supplies4d galvanized nails3" deck screwswood gluepaint, stain, polyurethane, sealer Toolsmiter sawsander/belt sanderdrill/driverclampssquare
Parts
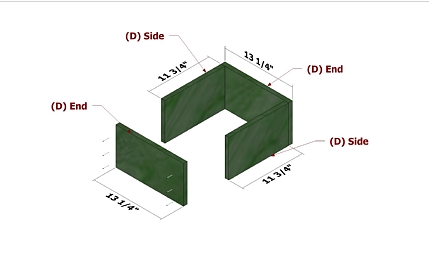
(A) Ends (2) - 1 1 /2 x 7 1 /4 x 48(A) Sides (2) - 1 1 /2 x 7 1 /4 x 45(B) Ends (2) - 1 1 /2 x 7 1 /4 x 31 9/1 6(B) Sides (2) - 1 1 /2 x 7 1 /4 x 28 9/1 6(C) Ends (2) - 3/4 x 7 1 /4 x 20 1 /4(C) Sides (2) - 3/4 x 7 1 /4 x 1 8 3/4(D) Ends (2) - 3/4 x 7 1 /4 x 1 3 1 /4(D) Sides (2) - 3/4 x 7 1 /4 x 11 3/4 All parts are listed in actual dimensions. Refer to the Cutting Diagram below (a larger version is in the pdf download below) as a guide for determining the specific board from which to cut the parts.